See you at six blog tour

See you at six blog tour

It’s been a while between blog posts as I haven’t been in the mood for sewing but that begun to change when Maaike from Maai Design asked if I would like to take part in another blog tour, this time to for the new See you at six range of rayon fabrics. I jumped at the chance because If the soft cactus range was anything to go by I knew it would be fabulous (and a sure fire way to get my sewjo up and running again.) 

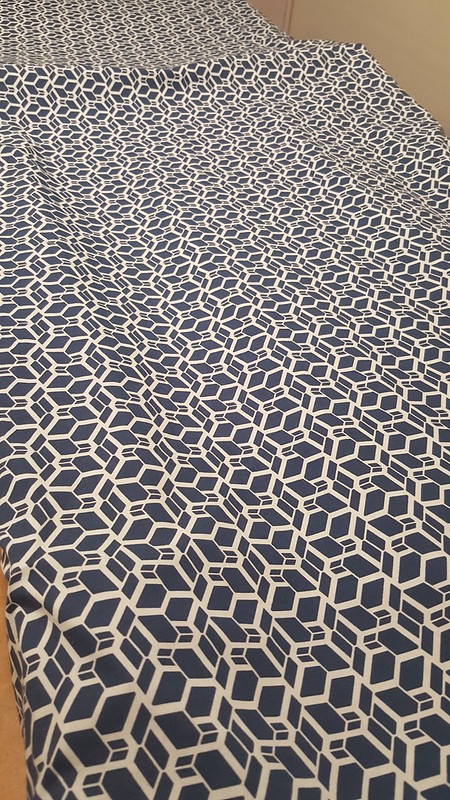
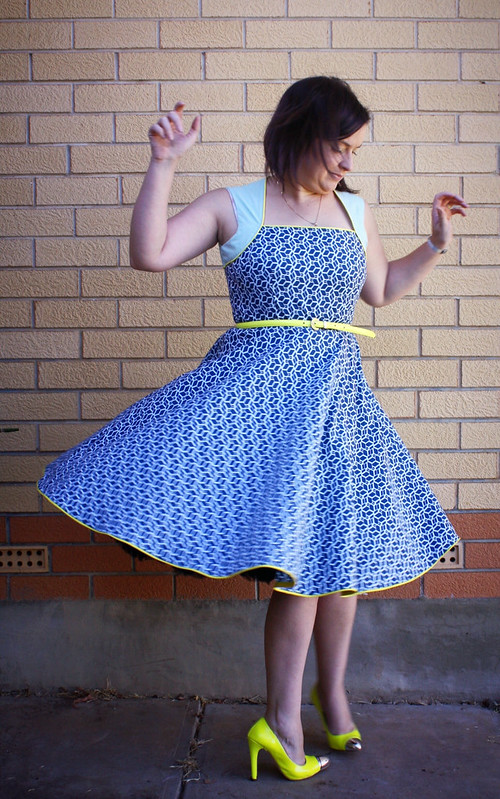
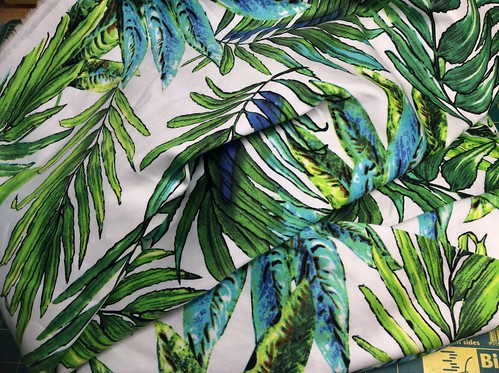
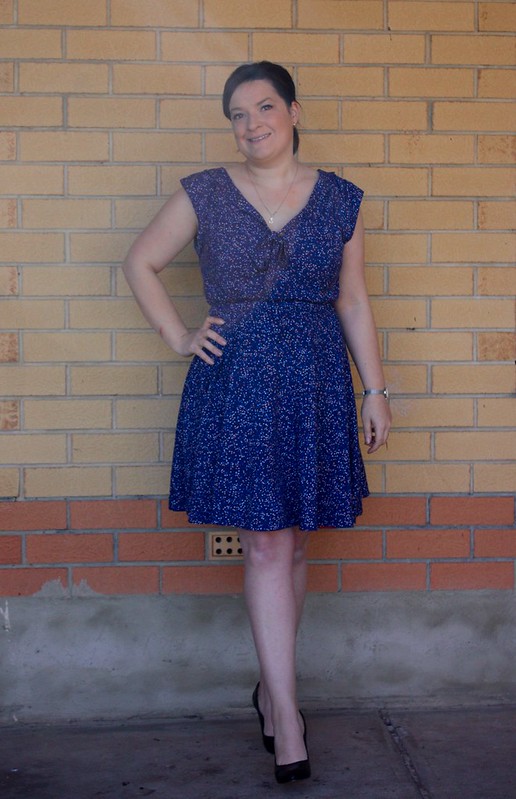
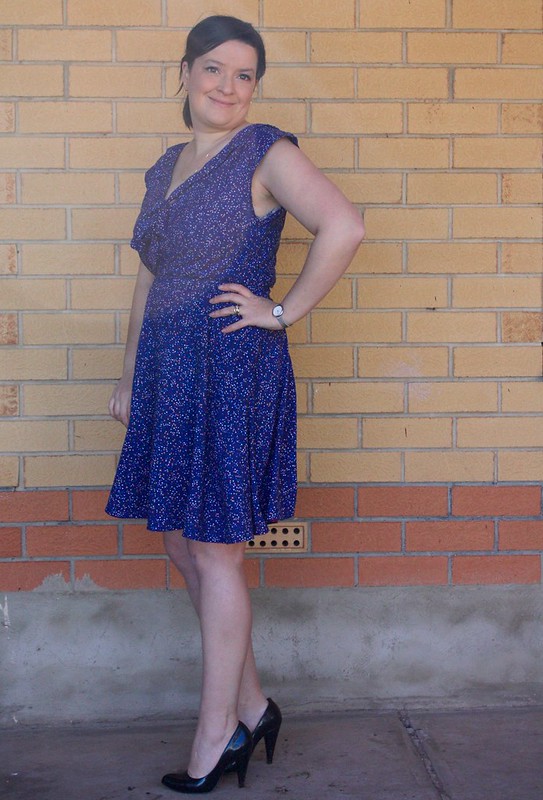
There are 12 amazing prints available in the See you at six range and no doubt like everyone else on the blog tour the hardest part by far was choosing just one wanted them all, in the end I ended up with the blue triangles. Though I have quite a few still on my wish list.

2016-09-19_10-40-07

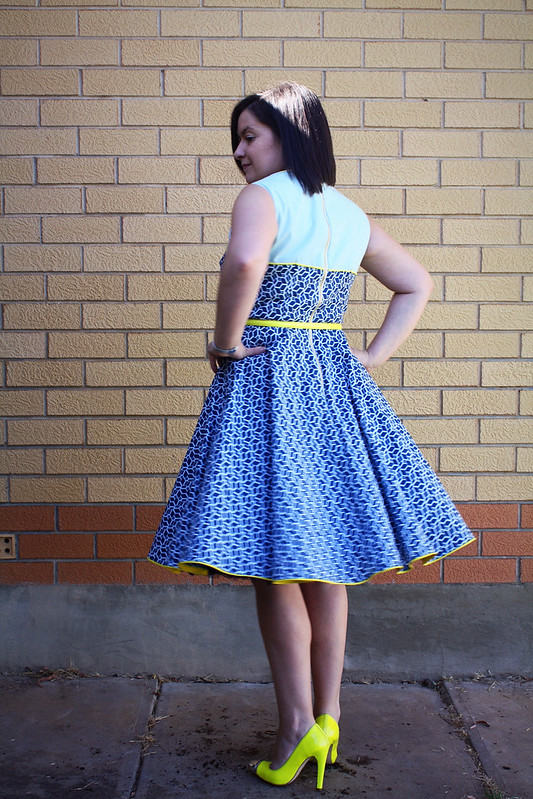
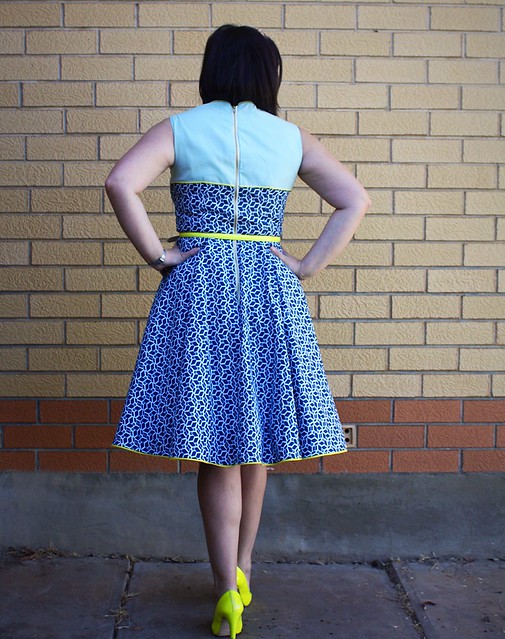
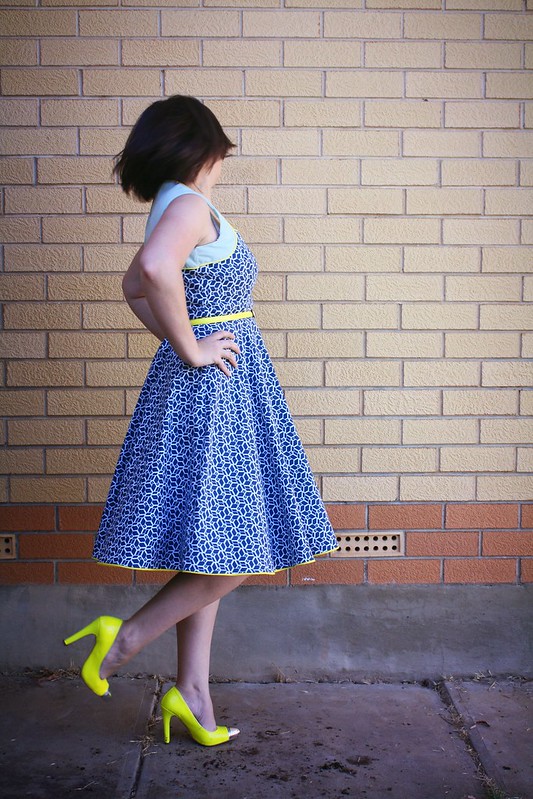
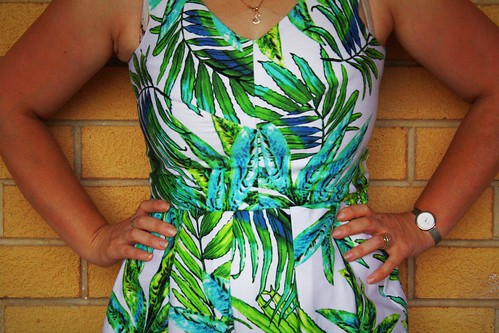
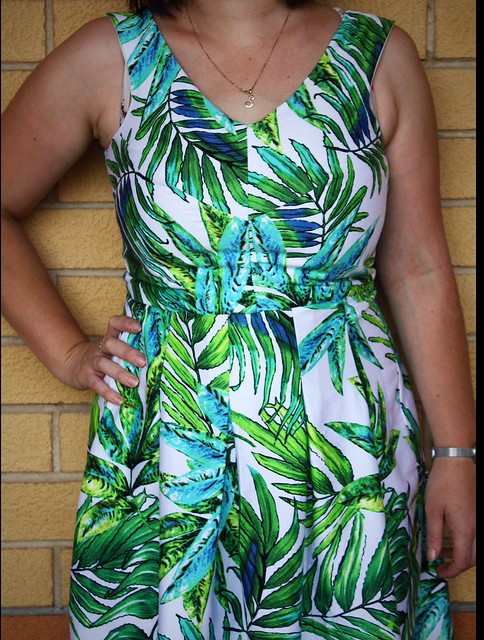
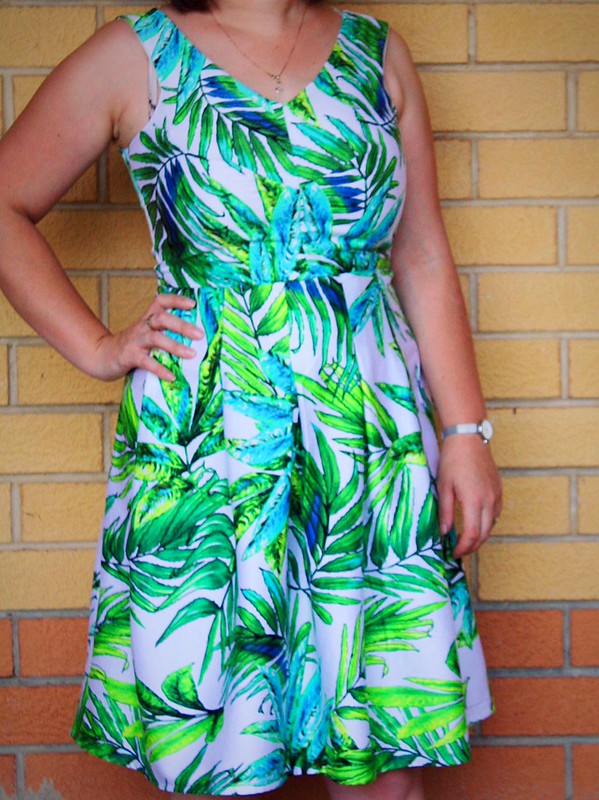
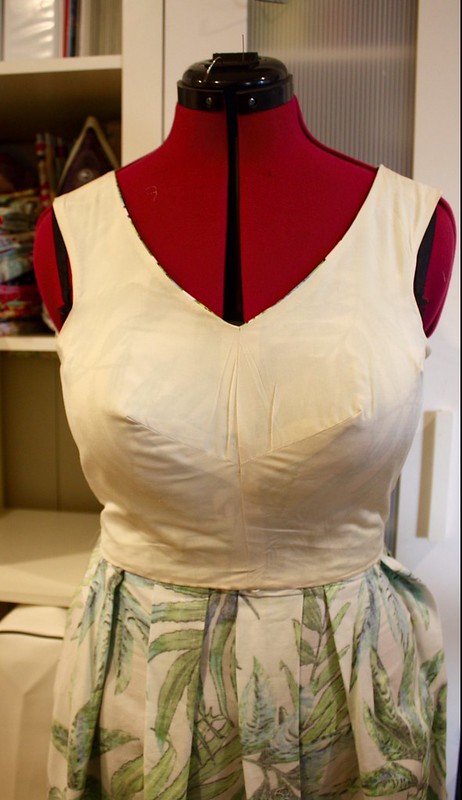
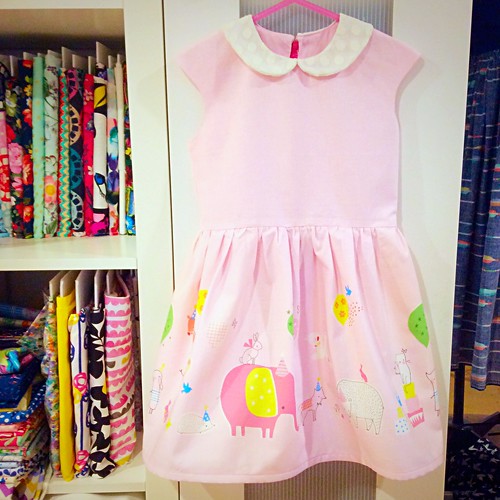
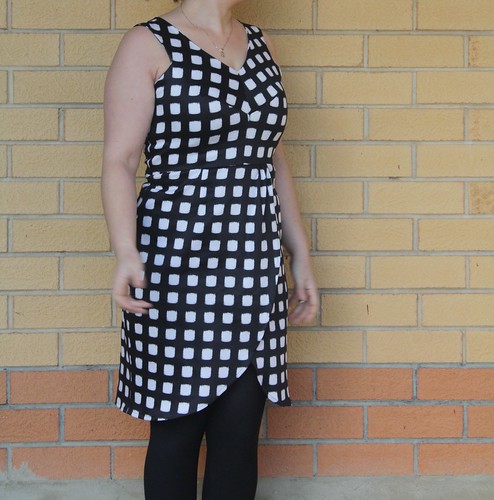
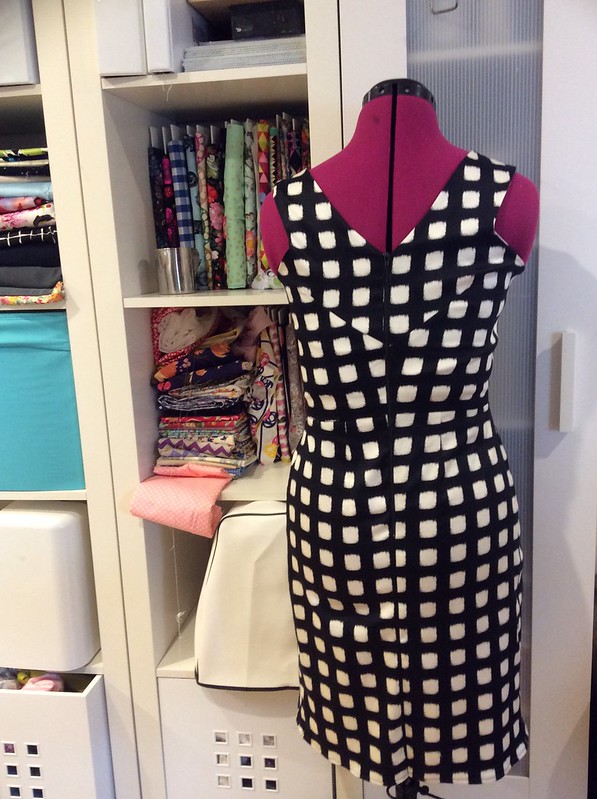
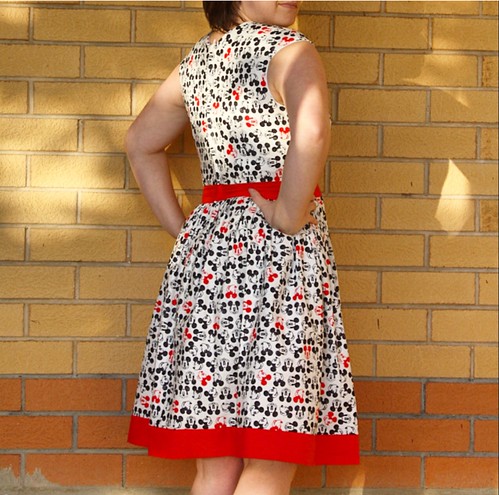
The dress is Deer and Doe’s Reglisse. It really is the perfect pattern for soft and drapey rayon if you ask me. I can’t believe this is only the 2nd time I have made up this pattern, especially when I think about how much I wear my First one  even now 2 years after making it.

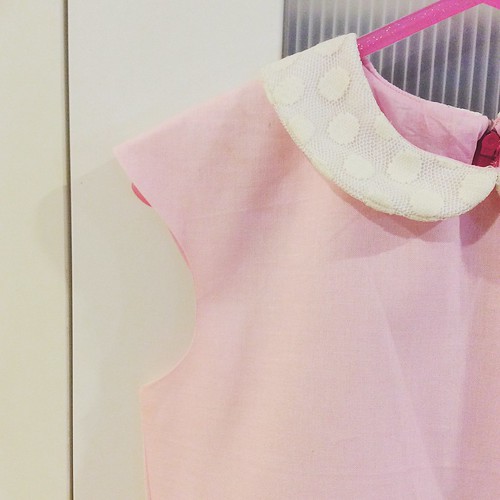
I cut a size 40 based on my measurements but in truth I could have cut a 38 as I ended up taking it in all over, next time I will possibly remove the shoulder tabs also to accommodate my short torso. Because I love a pop of color, I used some bright red binding to finish of the hem.

https://www.flickr.com/photos/60932701@N02/29777967395/in/album-72157644914791453/

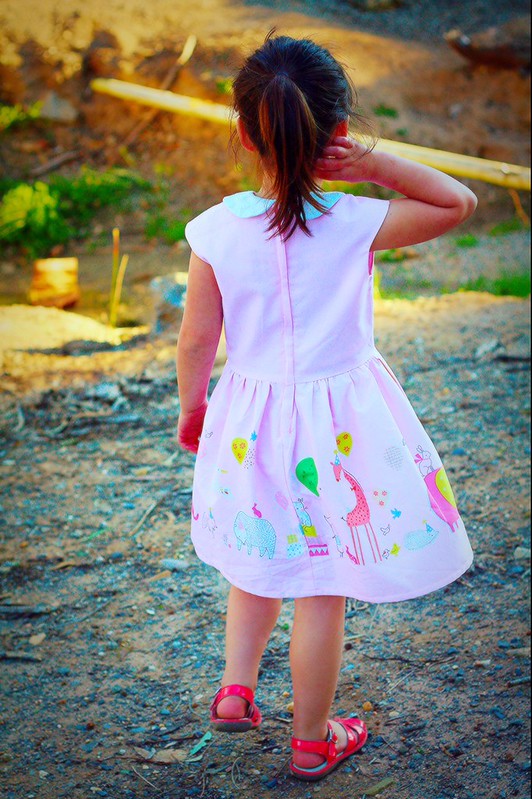
As for the fabric. After how much I enjoyed working with the soft cactus range I had high expectations and it really didn’t disappoint. It has such a lovely feel and weight to it and is just like secret pyjamas it’s so comfortable against the skin, plus it only needs minimal ironing after washing (which is a big winner in my eyes). I was surprised how easy it was to work with. It have had some epic fails with rayon in the past especially When it came to cutting out but This fabric was relatively easy to cut and work with but as to be expected with a circle skirt the hem did drop in places and needed to be evened out.

image

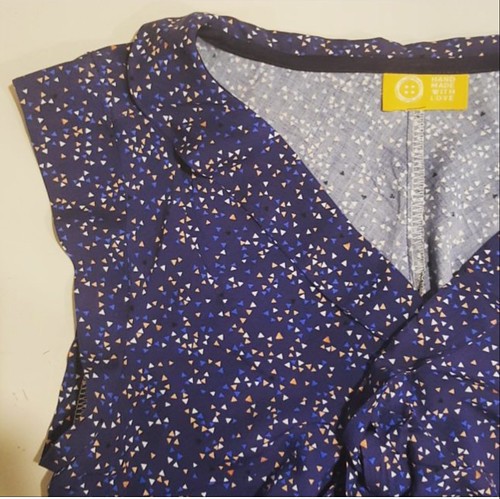
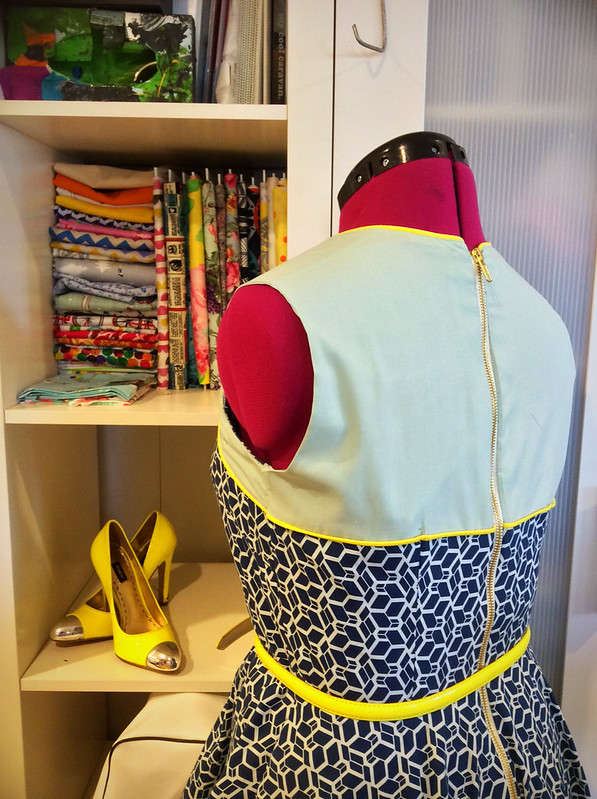
If you would like o see for yourself how fabulous the See you at six range is, Maai Design is offering a 10% discount as part of the blog tour, just enter the code seeyouatsix at checkout and the code is valid until 30th September. (Plus how cute are these labels from Maai Design that came with my fabric order)

Also please check out all the other fabulous bloggers taking part in the tour.

12th of September: Shelley from Bartacks and Singletrack

13th of September: Kate from Sewing With Kate

14th of September: Nicola from Create.nic

15th of September: Anne from Blogless Anna

16th of September: Caroline from Usefulbox

17th of September: Suz from Sewpony

18th of September: Allison from The Tall Mama

19th of September: Toni from Make It Perfect

20th of September: Suzanne from Dressed in Pretty Little Things

21st of September: Natalie from Sew Outnumbered

22nd of September: Jenya from While She Was Sleeping

23rd of September: Maaike from MaaiDesign

A little vintage caravan 

A little vintage caravan 

There hasn’t been a lot of blog worthy sewing happening around here lately, I have been doing a bit of pattern testing, but I can’t share those with you just yet so I thought I might share a bit about our little vintage caravan instead.

Bessie is a 1962 Harris Van. We don’t know a great deal about her history other than she was built here in Adelaide and the previous owners found her on a property in Minlaton on the Yorke Peninsula in 2012, dragged her home where she sat until we bought her .

We came across her on gumtree back in October 2015, there was one photo of the outside accompanied by a very brief description. For me it was love at first sight, the husband on the other hand was a little more apprehensive but happy wife, happy life and all that he went along with it and after several emails and phone calls we where on our way to the Yorke peninsula to pick her up.

When we got there she was even sadder looking than we could have imagined, she was riddled with rot and not much more than her aluminium cladding holding her together. if we hadn’t already transferred the rego in to our names before we picked her up the husband would have left her behind, But instead we taped her up, checked the wheel bearing, changed the tyres and hooked her up for the 300km trip home.

As soon as we got home we got to work. The husband started on pulling out the rotted frame work which was basically everything below the front and rear windows and the bottom third of the frame around the whole van not to mention the roof hatch and door too. While I started on the interior, and wrote a very long list of what needed to be done.

For the next 3 months we worked almost every night and weekend putting Bessie back together. All the rotted wood was replaced, the outside was scrubbed and polished and all her window rubbers replaced.

while the inside was cleaned, sanded and painted, her cushions recovered and new curtains made (see there was some sewing involved).

All the while trying to retain what we could as we have no idea what is original or later additions.

Oh and I made an awning too but That’s worth a blog post of it own.

Finally in January after lots of work she was finally finished!

we took her on her first trip for a quick weekend away with the in laws. Since then we have made several trips in our little vintage caravan including a weekend away with a group of fellow vintage caravan owners.

I’m not sure if the husband has quite forgiven me yet for insisting we drag home that sad and sorry looking caravan but just last month we dragged home another one, this time an egg shaped franklin caravan. I think we might be hooked.

So tell me do you have a vintage caravan dream?

Also for those interested Our caravan adventures can be found on  Instagram and If by chance you want to read the whole resto it can be found Here.

Blog tour: Maai Design and Soft Cactus

Blog tour: Maai Design and Soft Cactus

When Maike from Maai Design asked me if I would like to be part of her blog tour to promote the collection of European brand Soft Cactus fabrics I jumped at the chance, I mean I get to make something with pretty fabric? Count me in (I believe this may have been my exact response to her initial email haha.)

Maike’s shop is so well set out with gorgeous photos of both the fabric and some sample garments plus she has also included what co ordinates perfectly with the fabric. The hardest decision was by far choosing a print from the range, the prints, the colours they are all just Devine in the end I couldn’t decide I wanted them all. So I pulled out the big guns, I asked the husband to choose for me haha. His choice was the Skewed cubes in navy and some piping.

IMG_20160212_154624

It’s not very often that I purchase fabric with out a plan in mind, let alone let my husband choose, but really since I loved everything I saw I knew he couldn’t really go wrong.

The fabric itself is gorgeous, the “skewed cube” print has a modern geometric lace look to me the feel of it is soft and almost feels cozy to touch but still has a nice light airy feel to it, even after washing it still felt just as lovely. The only thing that threw me was the colour, I didn’t realise that the fabric is actually navy and a super light Aqua color not white. It is clearly listed as navy and Aqua on the website, but obviously I missed that part when The purchase was made. So my Initial plan of a white contrast went out the window, but a quick trip to the fabric store saw me come away with some lovely mint coloured poplin to use instead.

20160212_200530

The pattern is the now out of print Vogue 8280 and is well known for its instructions or lack there of, by sticking to the sleeveless version and referring back to my pattern notes from my wing song dress (thank you past Suzanne) I managed to avoid too much confusion and seam ripping. And the shoes, well they are just fabulous and match the dress perfectly…

Like with my Wind song  version, I pattern hacked the back of the pattern so that the contrast carried across the back of the dress instead of finishing at the shoulder and side seams Like in the original. To do is I lined up where the flange met the side seam and drew a line straight across from the bottom of the flange across the back pattern piece and then slashed and added a small seam allowance so that it old all would match up to the back.

I then added the yellow piping around the neckline and across the back where the contrast and main fabric met, I really like how this came out I just love the pop of yellow. I also stitched down the flanges to stop them from sticking out like my other versions of the pattern.

For the skirt, I used a self drafted half circle skirt, another thing I love about the soft cactus range of fabric is that it is wide! Meaning that you get a lot more bang for your buck, and you can cut a circle skirt on the fold, pure awesomeness if you ask me!

20160217_093324

After attaching the skirt to the bodice, I thought that something was still missing. While pondering on it, the husband suggested adding piping to the hem so that the yellow wasn’t all at the top of the dress. I think he is getting pretty good at this dressmaking stuff 😉 . To attach the piping I lined up the raw edges of my hem and the piping tape then stitched as close as possible to the piping using my zipper foot. Then, I folded up my seam allowance (which was the width of the piping tape ) and stitched my hem. I would have liked to have ran it through my overlocker by with it currently out of action I couldn’t. The dress was finished off with an exposed zipper.


I really like how this all came together. The fabric is just to die for and definitely the star of this one. I can see myself working my way through the entire range of soft cactus fabrics, and then maybe even moving on to the knit range too (yes you heard right, there is a knit range of fabrics too ) If you would like to try out the fabric range for yourself Maai design is offering a 10% discount valid until March 26th 2016, just enter the discount code maaidesign10% at the checkout and find out for yourself how lovely this range really is.

image

https://www.flickr.com/photos/60932701@N02/25497914322/in/album-72157644914791453/

March 8th – Suz from Sewpony

March 9th – Caroline from UsefulBox

March 10th – Kate from Sewing With Kate

March 11th – Allison from The Tall Mama

March 12th – Suzanne from Dressed in pretty little things

March 13th – Toni from Make It Perfect

March 14th – Natalie from Sew Outnumbered

March 15th – Jenya from While she was sleeping

March 16th – Nicola from Create.nic

March 17th – Shelley from Bartacks and Singletracks

March 18th – Maaike from

Confessions of a sewing machine hoarder

Confessions of a sewing machine hoarder

When I started sewing a few years back, I would have never envisioned myself having not 1 but 5 sewing machines, not to mention the over locker, embroidery only machine and spare parts machine for my 730 record…

It all started innocently enough, I wanted to upgrade my sewing machine. I had been sewing for a year or so and was starting to get frustrated with the limitations and terrible stitch quality of my basic department store bought Brother sewing machine.

For my 30th birthday, I took a big step and on a few recommendations and a test drive, I upgraded my sewing machine to a Janome DC6030. I absolutely love this machine, it’s fancy thread cutter and direct stitch selection where a huge step up from my first machine, not to mention the hugely improved stitch quality I thought I would never need anything else. Haha how naive I was..

IMG_20160202_104702

IMG_20160202_104803

Not long after, with an improved stitch quality I noticed a huge shift in my sewing and started to think about my finishes and even the possibility of sewing knits so of course I wanted an overlocker, after much deliberations and research I settled for a Babylock Stellar, it’s Babylock’s base model, it doesn’t have any of the bells and whistles like air threading, but the whole front opens out making it easy enough to thread and it came with a handful of free lessons so I was sold.

IMG_20160202_104326

IMG_20160202_104521

I was happily sewing along, with my Janome and Baby lock thinking this is the life, when in a space of around 6 weeks, I came in to possession of both another sewing machine and an embroidery machine.

The sewing machine is another Janome, this time a DC2050 an entry level computerised machine that belonged to a dear friends late grandmother, the machine had barely been used and I couldn’t bare for it to go else where, I justified it by thinking it would be nice to have a back up machine for when my main machine went in for a service, or even I could use it to teach my nieces who had shown an interest to sew.

IMG_20160202_125943

IMG_20160202_130117

And the embroidery machine you ask? it’s a Bernina Deco 330, an embroidery only machine that was given to me by an Aunt how bought it new, used it maybe twice then packed it up and left it in a cupboard as she preferred to use her Janome instead. when she heard I had taken up sewing she offered it to me, and well I’m not one to say no to family or a machine that needs a good home it seems..

So here I was almost a year after I upgraded my first machine having gone from one machine, to 2 sewing machines, an overlocker and an embroidery machine. Any sane person would have said, yep that’s enough but not me… After the embroidery machine I started to look in to Bernina machines, I had heard about them in the online sewing world but never really paid much attention. I saw how much they where loved specifically the vintage kind and began to like the idea of adding an old, all metal machine that could handle just about anything to my “collection”

IMG_20160202_104608

Screenshot_2016-02-02-13-36-01-1

For Mother’s Day last year, the idea came to fruition and the husband found me a lovely Bernina 801 and I was instantly in love, I could see what all the fuss was about, it sewed beautifully, and handled anything I threw at it. That was it, I thought I was done, I have more than enough machines I said…

Until… One day I was on one of the online auction sites when I saw it, a Bernina 730 Record.

IMG_20160202_103924

IMG_20160202_104228

IMG_20160202_104118

I just loved the vintage shape and colour and it looked like it was in pretty good shape, and all for $20! Before I knew it I was driving to the other side of town to pick it up. it had belonged to the guys mother who had gone in to a home, he knew nothing about it and just wanted to be rid of it as it was taking up space. When I saw it I couldn’t believe it, it looked fantastic, had all the original accessories including the dealer catalogue with hand written notes and it worked.

IMG_20160202_104026

The original plan was to sell it on, I even listed it for sale and had a lady wanting it, she had one that needed parts and wanted to use mine as a donor machine, I just couldn’t sell it, not just to be pulled apart anyway. So I kept it much to the husbands dismay… I promised him that would be it, I had more machines than I needed, I wouldn’t bring anymore home (yeah right)

I wasn’t looking for another machine. I’d promised the husband that I wouldn’t bring anymore home, I had more than enough blah blah blah.

I was in a second hand shop looking for some treasures for our recently acquired vintage caravan, tucked away in a corner saw a box with Elna in a bright orange print I couldn’t help myself, I had to have a look. Low and behold the box held a little Elna lotus.

IMG_20160202_125310

IMG_20160202_125357

but there was no foot pedal. I was going to not worry about it but I mentioned it to the husband and jokingly said it would have been perfect to take away in the caravan. Surprisingly he agreed and suggested I see what a replacement pedal would be worth, I made some calls and found one so went back and bought the little Lotus. when I went to collect the pedal, the sewing machine repair guy tested it out for me and was quite excited by my little treasure, he couldn’t believe the condition and that it still had the original cardboard box and accessories, he offered to buy it off me there and then but there was no way I was going to part with it, not yet anyway. I can’t wait to take it away in the caravan.

IMG_20160202_125603

IMG_20160202_125224

So can you really ever have too many sewing machines? Probably… I’m pretty sure I have enough machines, I’m starting to run out of space to store them but I’m not going to say that I won’t bring anymore home, because honestly, the last couple times I’ve said it, it hasn’t exactly worked out. Maybe I just need to accept my hoarding ways instead.

IMG_20160202_103755

So how many machines are too many? And how many do you have, I’m sure there are other fellow hoarders out there, I can’t be the only one… Can I?

The New Year’s Eve dress that wasn’t

The New Year’s Eve dress that wasn’t

What better time to decide to make a new dress than a few hours before you need it. Well that’s what happened here and as you can imagine, I didn’t quite make it to the finish line and ended up wearing another me made instead.

Sewing hasn’t been at the top of my priorities list of late due to our recent purchase of a vintage caravan who’s restoration has been taking up most of our time, but that’s a blog post for another day.

Plus any sewing that I have done Hasn’t been that exciting. To be honest I’ve been in a bit of a rut and needed something new to pull me out. Well neither of these patterns are new to me, but both Ive only made once before, and never together so close enough if you ask me

The bodice is By Hand London’s Sophia dress, I love this bodice, the bust darts the arm cut outs love it all. After my previously blogged checked version it’s been in the back of my mind to make another but true to form I wanted to hack the skirt again, I really like the godet version of this pattern but didn’t have enough of any fabrics in the stash and since the dress was a last minute decision on New Year’s Eve I didn’t have time to go get anything.

The skirt, is from vogue 1353. I’ve previously made this pattern back in the early days of my sewing adventures, and it’s such a great pattern, I really need to make it in its entirety again soon. I went with this because it gave me the same vibe as the godet skirt but with a lot less fabric needed! A Winning combination in my opinion.

The fabric is a fabulous palm tree print cotton sateen from spotlight, I had seen some many fabulous things made with this fabric that when I was in spotlight looking for curtain fabric for the caravan and spied the last couple metres of this on sale I grabbed it… The curtain fabric on the other hand, well that needed another trip.

Construction was pretty standard, as with my previous Sophia, the straps where shortened about an inch, and I also did a small sway back adjustment. to try and save time I only lined the bodice. With the skirt the only modification I made was to leave off the decorative hem detail once again to save time, and also I think it would have got lost in the print. The dress was finished off with an exposed zipper, I would like to say that this was my plan all along but truthfully this was partially because I needed a little bit extra room around the middle after Christmas Day and I was in too much of a rush at the time to realise, but I think it looks the part anyway.

While it may not have made it to the New Years celebrations, it’s still a winner here. One of my sew year resolutions is to make more practical things for my wardrobe, so as much as I love this combination I don’t know when or if I’ll make it again, but one things for sure, I’m going to wear the heck out of this one in the mean time.

Green Bee Pattern Frances dress

Green Bee Pattern Frances dress

Some time ago I started my quest for the perfect shirt dress, I wanted something transitional that I could pair just as well with tights and boots or bare legs and sandals There have been many failed attempts and even more tears on this journey but I think I may have found the light at the end of the tunnel (insert happy dance here)

https://www.flickr.com/photos/60932701@N02/22477811773/in/album-72157644914791453/

After venting my frustrations on IG I was pointed in the direction of Green Bee patterns and more specifically the Frances dress, I had never heard of green bee patterns or the Frances dress before but when I looked it up it was strikingly similar to the picture I had in my head and with nothing to lose it was on its way to my door.

Ok so all that happened in about April this year, fast forward to now and I hadnt done more than cut out the long sleeved version (as I had planned to have this all sewn up by winter haha yeah right). I had the public holiday down as a sewing day and when my originally planned project fell through due to lack of appropriate lining fabric, I pulled this one out and got to sewing.

The long sleeved version I had cut was a mid weight polyester with a lovely drape and almost a microfibre feel to it. From memory I went with a medium but I must have cut a larger size in the sleeves as they felt very puffy but other than that the only changes that I made where to increase the with of the back darts slightly to give a bit more shape at the waste.

On to the real thing, The main fabric is by art gallery fabrics and was purchased from the fabric closet on a recent trip through Broken Hill and The contrast is black voile courtesy of the stash. I only had a bit under 2 metres of the main fabric so went with the short sleeved version and underlined it in voile also as being a light colour its was a little on the sheer side.

https://www.flickr.com/photos/60932701@N02/22706751429/in/album-72157644914791453/

As for construction I went with the medium again which was slightly over my measurements and opted to use French seams throughout, since the pattern calls for 1/2 inch seam allowance I would say that the sizing ended up closer to a small by using the French seams. I also forwent the pocket and cuff detail because i was a bit worried it might send it in to 50s diner costume territory.


https://www.flickr.com/photos/60932701@N02/22477796453/in/album-72157644914791453/

Unlike the first version the initial fit was a bit on the boxy side and I think this was to do with the underling And the cotton having less drape than what I used on my muslin so to combat this I graded the side seams from nothing at the underarm to about 2cms at the waist and back to nothing at the hips, I also slightly increased the width of the back darts to nip it in a bit more.

https://www.flickr.com/photos/60932701@N02/23085332282/in/album-72157644914791453/

Overall I think I have found what I’m after. I love the vintage vibe from the combination of fabric, contrast and shape that this little dress gives but next time, I think I’ll stick to a fabric with more drape for a more casual look.

Straight grain patterns Tinny Dress

Straight grain patterns Tinny Dress

Things have been a bit quiet on the sewing front recently besides some last minute sewing for a spur of the moment 3 week trip to Cairns (what better way to beat the winter blues than a trip to North Queensland) so there hasn’t been a lot to blog about until now! 

I was lucky enough to be a pattern tester for the re vamp of straight grain patterns Tinny dress

I don’t sew for little miss as much as I probably should so when An from straight grain patterns put out the call for testers for the re vamp of the Tinny dress I jumped at the chance. Despite still being on holiday An was very lovely and let me still test for her. (YAY!)

If you are not familiar with The Tinny dress, it is a vintage inspired mix and match girls dress. Originally it came with 4 collar, 3 skirt and 2 sleeve options. Which has now been expended to 8 collar, 4 skirt and 3 sleeve options.

Since This was a test for a girls pattern, and Little Miss was the one I was sewing for I let her make all the choices for this one, and I must say, for a 4 year old I’m pretty impressed with her choices. 
She chose the built in cap sleeve option bodice, regular Peter Pan collar and gathered skirt. 

As for the fabric after much deliberation she settled some spotty stretch tulle from the stash for the collar and the cutest border print that was purchased from the Fabric closet on our recent holiday, the print is aptly named Hip hooray by Lizzie McKay for blend fabrics. 


 The dress went together beautifully with no problems at all. The instructions and diagrams and well detailed and easy to understand. At the request of the little miss I deviated slightly in my test and added inseam pockets to the skirt (even at 4 she knows how awesome pockets are in a dress) I also inserted a lapped zipper instead of the recommended hidden this was only because I prefer them in little girls dresses as I find them a bit more durable. I have 2 older nieces who if I made this dress for I would certainly use the hidden zip as recommended. 

The verdict from Little miss is that she loves it and wants more. I have a feeling letting her have free reign might have created a monster as she has asked if we can go fabric shopping so she can pick her own fabric from now on.  
All in all this is a well executed and delightful girls pattern with so many cute options to mix and match that I think I’ll get many years worth of party dresses even as the little miss gets older, the fabric choices on the other hand, may be an on going topic of contention though😉

*An is also offering a discount on the revamped tinny dress when you use the code TINNYTESTER20 at the check out.

International Anna Party 2015 

International Anna Party 2015 

I have a bit of a confession to make, whilst I had seen many lovely versions around the Internet I never really got what all the fuss was about when it came to the Anna, and to be honest I only purchased the pattern after By Hand London announced they where ceasing production of their paper patterns and thought that I should have a copy of it in my stash even just for posterity.

https://www.flickr.com/photos/60932701@N02/20650739916/in/album-72157644914791453/
So when the lovely ladies Elle from Laura loves pugs , Ute and Pips from The girl in a teacup  announced an International Anna Party to celebrate both By Hand London and Elle’s pending birthday, I thought I’d give it a go. I originally planned to make my Anna in a lovely green vintage cotton blend from my stash, but during pre-wash the fabric fell apart. I was devastated and a little bit defeated but a quick trip to see the ever lovely ladies at quite possibly my favourite little fabric store The Drapery , saw me come away with 2m of some of the most scrummy Nani Iro double gauze and some new enthusiasm for The pattern.

I cut a straight US10/UK 14 and scooped the neck out around 5cm. A tissue fit saw me shorten the bust pleats about 3 cm in an attempt to avoid doing an FBA which seemed to work well. And grade the zipper around 5cm to account for my narrow shoulders, in hindsight I should have possibly done a sway back as well but will keep this in kind for next time. The dress is fully lined in some lovely oyster coloured silk from my stash which just feels devine. I also went with a gathered skirt over the included one, the dress was then finished of with an exposed metal zipper in an attempt to avoid the Nani Iro getting caught in an invisible zipper.

image

https://www.flickr.com/photos/60932701@N02/20676992085/in/album-72157644914791453/
Then to top off my Anna initiation. I won a prize of 2 of the most gorgeous screen printed Lithuanian linen tea towels from bells and bee for my Anna as Magdalenesmuse’s favourite modified Anna. one of which now watches over me while I sew.

https://www.flickr.com/photos/60932701@N02/20650680196/in/album-72157644914791453/
It’s safe to say I’m officially an Anna convert and can’t wait to add some more to my wardrobe.

By hand London Sophia dress

By hand London Sophia dress

Here we are in July already! Where has this year gone? Between a birthday almost every weekend for the last couple of months and my recent sewing rut, there hasn’t been time or even a lot I’ve really felt like blogging about.

But, then there was Sophia.

If you don’t know, the Sophia Dress is from the fabulous ladies over at By hand London, With a sleeveless V-neck bodice complete funky angled bodice darts and armholes, 2 skirt variations, a super twirly vintage inspired panel and godet version and also a sleek fitted skirt with a centre front split. There is even a super cute collar option. it definitely lives up to its description of a versatile party dress.

I had originally planned to make up version one, the vintage twirly skirt skirt version minus the collar, in some gorgeous Michael miller spring fling print but chickened out when I couldn’t decide what to do with the godets in the skirt. I don’t have enough of the main fabric so they will need to be contrast, I just can’t decide with what. I’m still considering using the gold confetti boarder print I posted on Instagram, but need to sit on it for a while.

https://www.flickr.com/photos/60932701@N02/19517662260/in/album-72157644914791453/

While still pondering my Sophia dress, I came across this checked cotton sateen at spotlight on sale for $5 a metre. Ever since my black and white Emery dress I have been on the hunt for a similar print so snapped this up quick smart & a new Sophia plan was hatched!

https://www.flickr.com/photos/60932701@N02/19698997262/in/album-72157644914791453/

Being a cotton sateen, I knew that my dreams of a twirly vintage style skirt would have to go, but wasn’t sold on the straight skirt version of the dress. I like sleek and fitted but with little ones to chase after its not the most practical choice, so once again I was pondering my skirt options. I started shifting through my pattern stash looking for some inspiration and it hit me in the form of another of By Hand London’s fabulous creations, the Kim dress and it’s beautiful wrap skirt Hallelujah! A Fitted silhouette with a little more room to move, the perfect solution for my Sophia.

With the skirt dilemma finally sorted (YAY!) It was on to construction. I cut a straight Us10/UK14 in both the bodice and skirt. A tissue fit of the bodice showed I needed to shorten the straps about 2cm and also do a sway back adjustment of 2.5cm at the zip graded to nothing at the sides. for once I didn’t have to do any adjusting at the bust thankfully as I wouldn’t have a clue where to start on this one.

With Both patterns being from By Hand London it meant that the skirt fit to the bodice out of the packet beautifully. The Kim skirt did require some altering in the way of tapering of the side seams to fit my less than ample hips and almost a 5cm grade at the zipper to accommodate my flat behind, that right there is the reason I normally avoid fitted skirts damn you flat behind!

https://www.flickr.com/photos/60932701@N02/19705718885/in/album-72157644914791453/

Because I am no 6ft tall Glamazonian (is that even a word) I also shortened the skirt by around 5cm, this was at the hem on the back pieces and just below the dart on the front pieces. If I where the make it again I may consider taking a further cm or so off. I haven’t lined the skirt, but it’s winter here at the moment,and I’m living in tights under dresses, so there is a very good chance that I’ll be going back and lining the skirt, but I’ll will need to do a test wear to see how much it annoys me first😉

Sewaholic Cambie Dress

Sewaholic Cambie Dress

https://flic.kr/p/ufZbwS

Well if nothing I like a tight deadline it seems.
With less than 24 hours left of dress week for indie pattern month, I decide I’m going to get sewing on the Mickey Mouse Cambie dress I had planned to get my sewjo back.

The pattern is an all time favourite, and I believe a perfect silhouette for any novelty print, the Cambie Dress from Sewaholic in view B. The fabric is some Mickey Mouse quilting cotton from my local spotlight, plus some red poplin for contrast from the stash. The dress is also lined in plain white poplin also from the stash.

https://www.flickr.com/photos/60932701@N02/18224449480/in/dateposted-public/

https://www.flickr.com/photos/60932701@N02/18549244231/in/dateposted-public/
Modifications made, include a 1inch FBA, a shortened bodice, and I also used a self drafted quarter circle skirt for the lining to avoid the additional bulk the recommended gathered version adds. Contrast trim added to skirt hem to help balance out the print a little. Lapped zipper, I also left out the pockets to save some time, but I can already tell I’m going to regret it and will probably go back at a later date and add them in.
https://flic.kr/p/ufZbwS

For a super quick make, I’m so happy with how it has come together. I love every single Cambie dress I make, but I think this might be a new favourite. I especially love the contrast trim on the hem.

A